Hi all,
After becoming a member a while back to get at the software downloads, I thought I'd share something back in the shape of my recent efforts to silence my Quicksilver G4. People still using G4s, especially for audio, might find it useful.
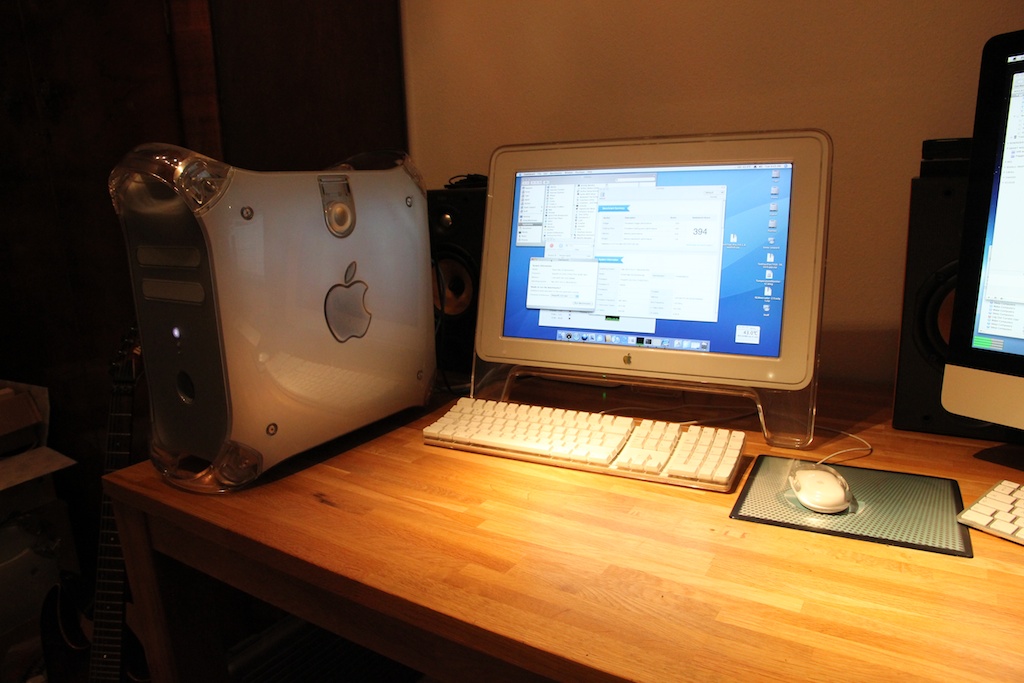
Mine was rescued from someone's garage by a guy I know who then put it in my dad's garage, where it spent a few years doing nothing. Then at some point I decided I wanted a Mac that could run OS 9, so I got it out to see what it was. It still worked, it was a 733 MHz Quicksilver, so I took it home and started fiddling with it. I found a nice Cinema Display to go with it for €10, and added a couple of WD disks I had lying around. I overclocked it to 867 MHz, and all was basically well until the noise started getting to me. Apparently these aren't the loudest Macs, but it was plenty loud for me, so I went looking for ways to shut it up. I have to say it has worked out rather well, if I do say so myself: I've got it up on the desk right now so I can easily open it up, and I have to close both the window and the door to even hear it. If I don't either the tv in the living room or the background noise from outside will drown it out.
I didn't take pictures along the way, but I do have pictures of the current work-in-progress state, and most of it should be fairly self-explanatory anyway. As the machine had cost me nothing, I decided the silencing mods preferably shouldn't cost anything too, and if at all possible I would use old stuff I had lying around. Cheap and cheerful, as it were. Thankfully, there was some useful stuff: from an abandoned project some years back I had left over 4 nice 120mm Papst fans, along with assorted Molex and IDE stuff. So far, while I have modded the case quite extensively, most of it is easy and all of it is reversible - apart from the odd hole here and there.
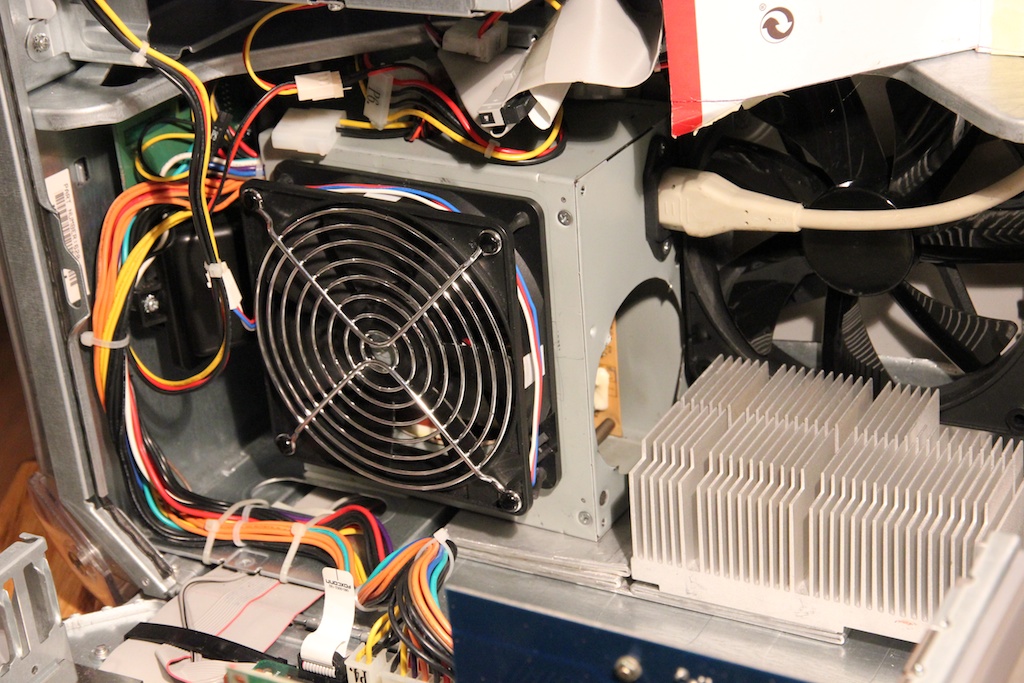
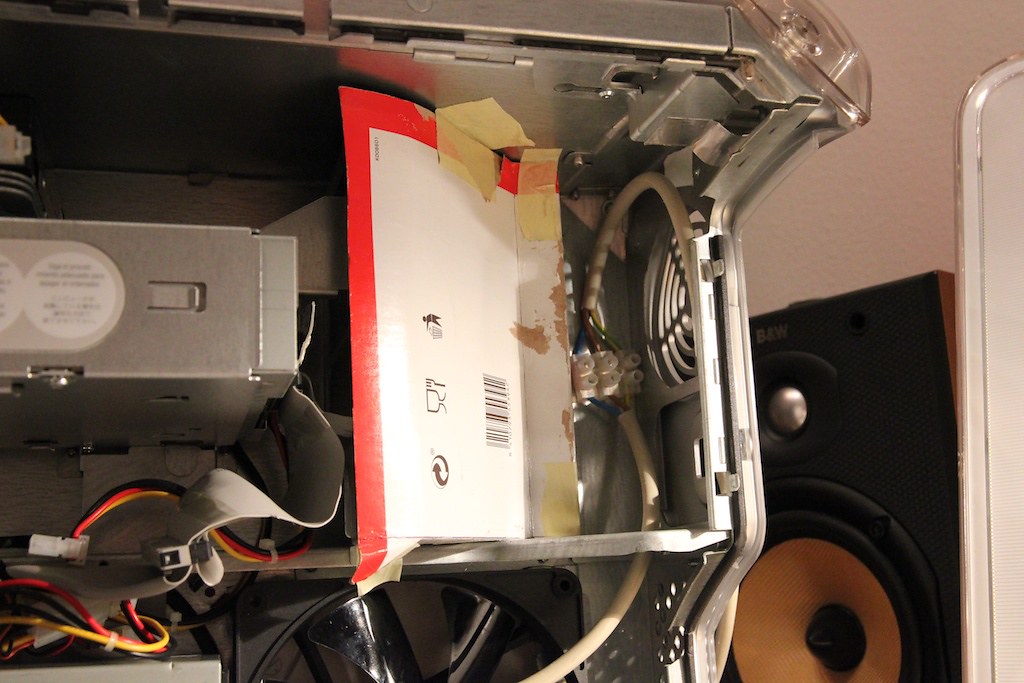
In the beginning I did the usual things like cut out the metal grilles, and while this helped it was clear the fans themselves were a big part of the problem. I couldn't see a way round the noisy PSU fan so I spent almost twice as much as I'd spent on the entire thing to order a quieter 80mm fan. While I waited for this to arrive, I turned my attention to the CPU fan. I tried fitting a larger fan, I tried removing the modem port to run two fans side by side, but in the end it became clear that no matter what, the PSU would always be in the way. That's when I noticed the large open space on the bottom of the case, to the front, where full-length PCI cards were supposed to go. I don't have any, and I am not likely to obtain any in the future, so I thought: why not try to fit the PSU there and make room for a proper CPU fan?
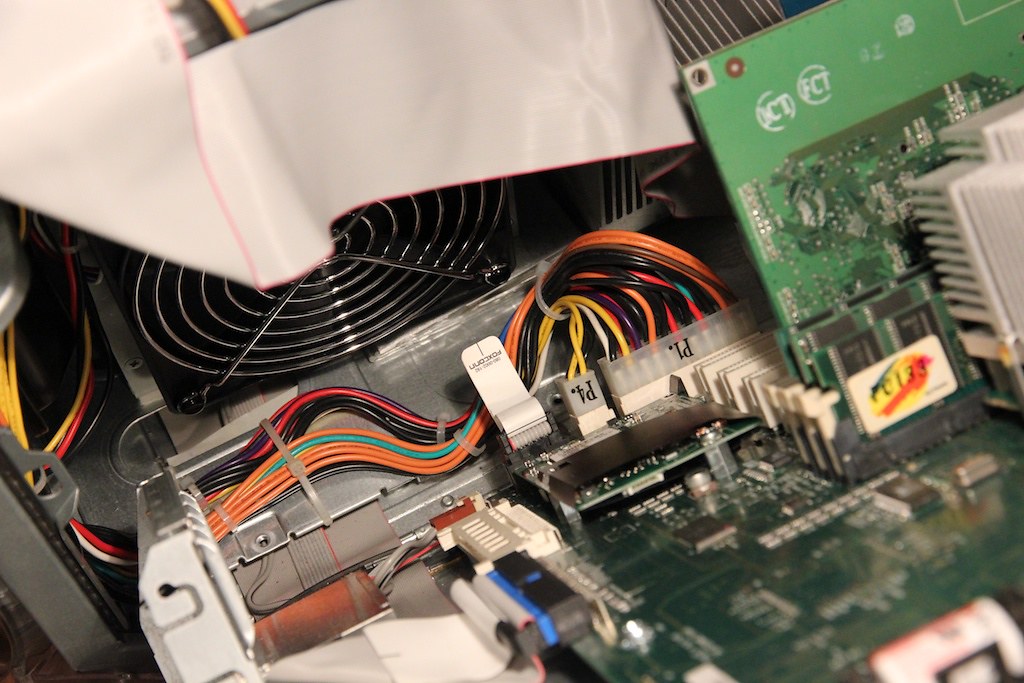
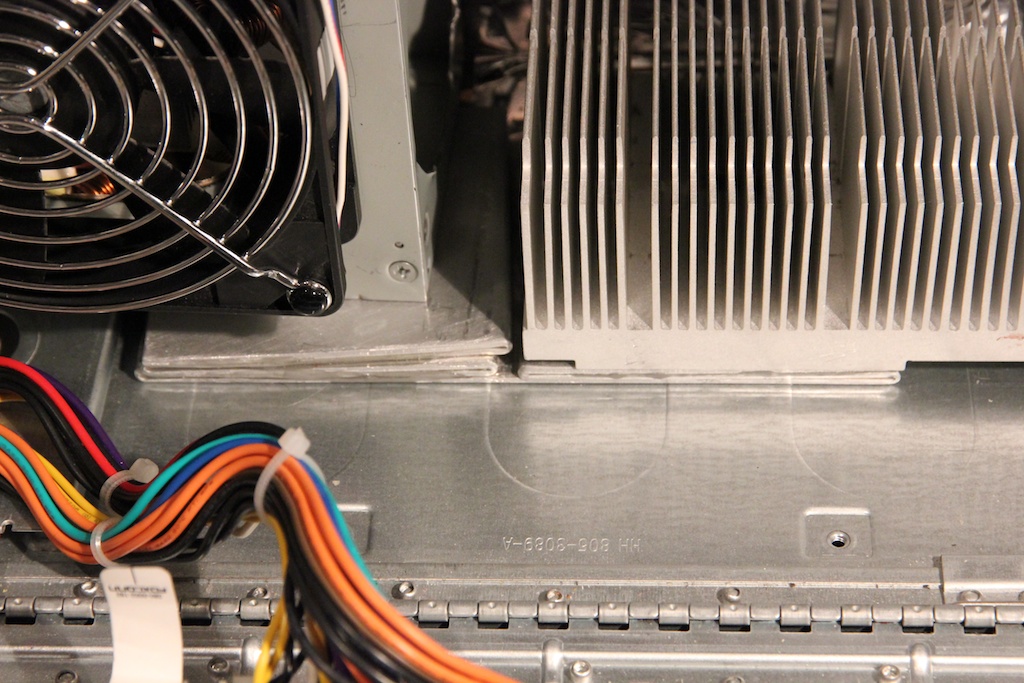
So I did. I took out the PSU and started fitting it on the bottom of the case. I also took off the cover of the PSU and took out the standard fan. While the cover was off I cut a hole in it and fitted a 120mm Papst, blowing in. After I got rid of the casing for the 120mm case fan and the speaker cover, it all fitted neatly:
Then, since I wasn't going to need the new 80mm PSU fan after all, I did some measuring and decided to change the order to a 140mm NoiseBlocker fan, which I stuck to the side of the case, blowing out:
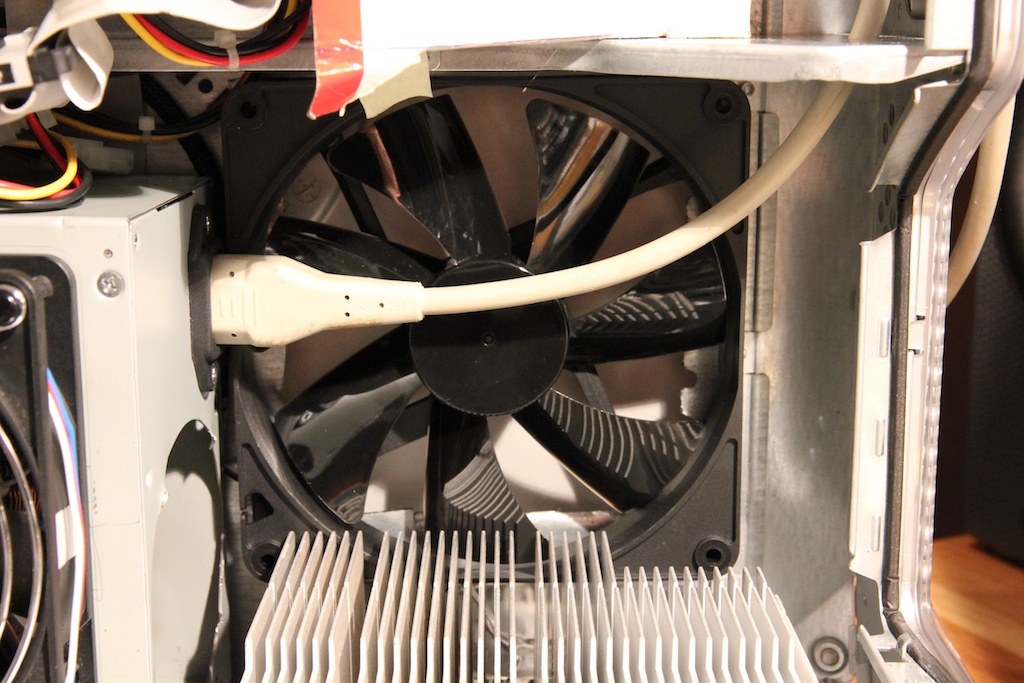
You may notice I also made a large hole in the side of the case, behind the fan, to accommodate the airflow of the larger fan. That would be one of the non-reversible bits of this mod.
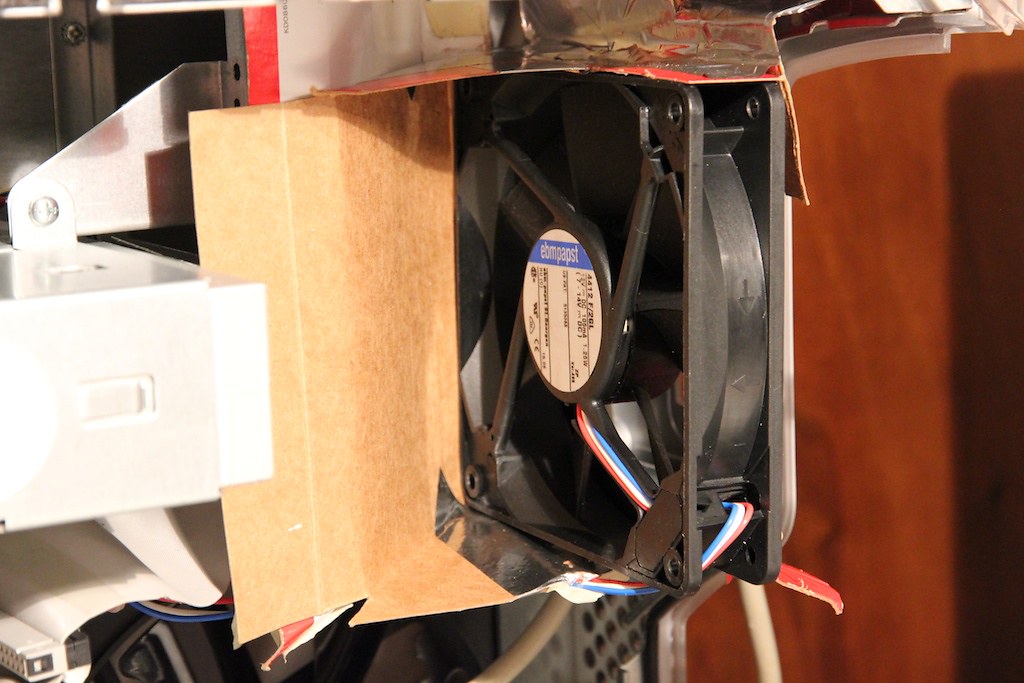
Next, on the CPU heatsink, at first I fitted another 120mm fan with a shroud to blow the air across the heatsink, something like this:
...but the problem with that was that it needed careful positioning or the top of it would hit the edge of the case when closing the lid. However then I found that when the fan was low enough not to hit the case, it would hit the little shelf halfway up the case when closed, which would push it back, after which it would again hit the case. This has yielded me one particularly nasty crash when I closed the lid with the computer running, hitting the CPU fan and heatsink on the edge of the case.
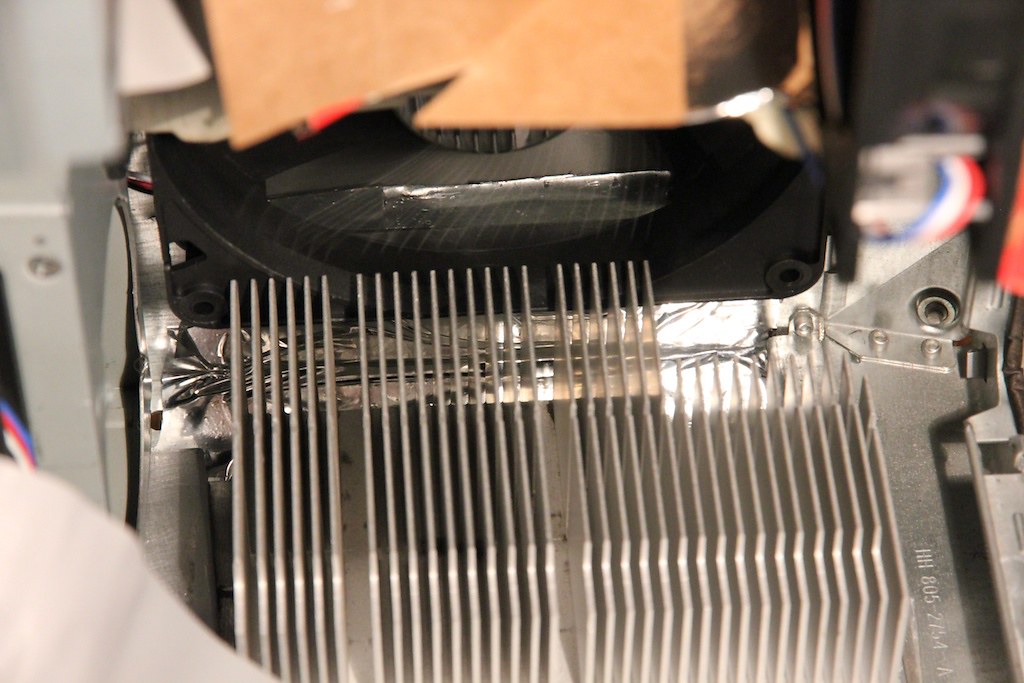
Clearly this was not the way forward, so instead I just stuck the CPU fan with its shroud into the top of the case, where the PSU used to live. Behind it I added a separation to stop it recycling warm air from the rest of the case. Like so:
Separator wall:
...and CPU fan:
The CPU fan now gets all its air in through the back of the case, and blows it across the heatsink, and a little towards the hard drive that I ended up putting there, on top of the DVD drive:

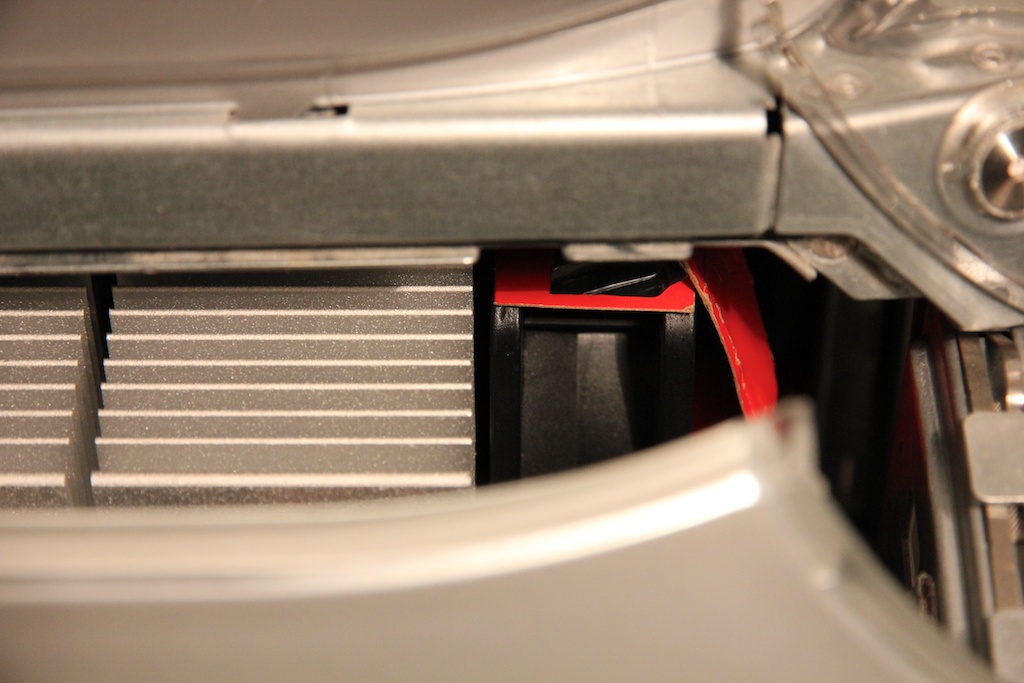
When the case is closed, the CPU heatsink falls neatly into the shroud within the upper case:
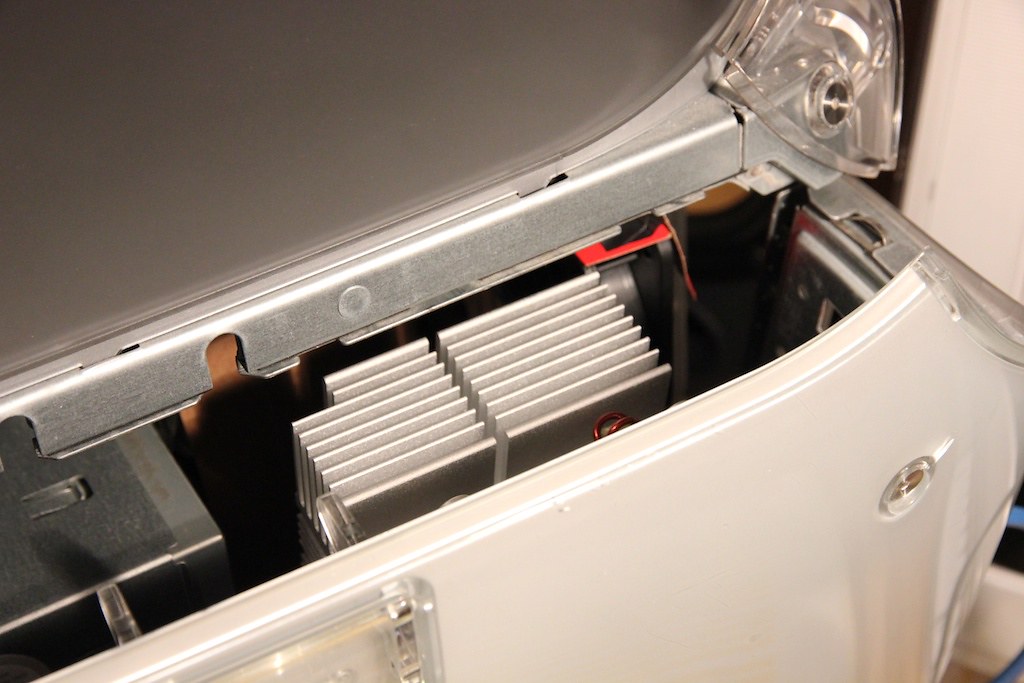
...and just clears the new CPU fan:
You may notice I retained the bracket that held the PSU in place. As it turns out, it has just the right dimensions to support the separator wall, and allows for a more secure fit of the DVD drive. There were a few more of these fortunate coincidences: when the PSU is fitted like this, the main wiring loom neatly folds itself into the corner of the case, and below the new 120mm PSU fan:
I tie-wrapped it to the bottom of the case, but mostly because it thought it would be rude not to.
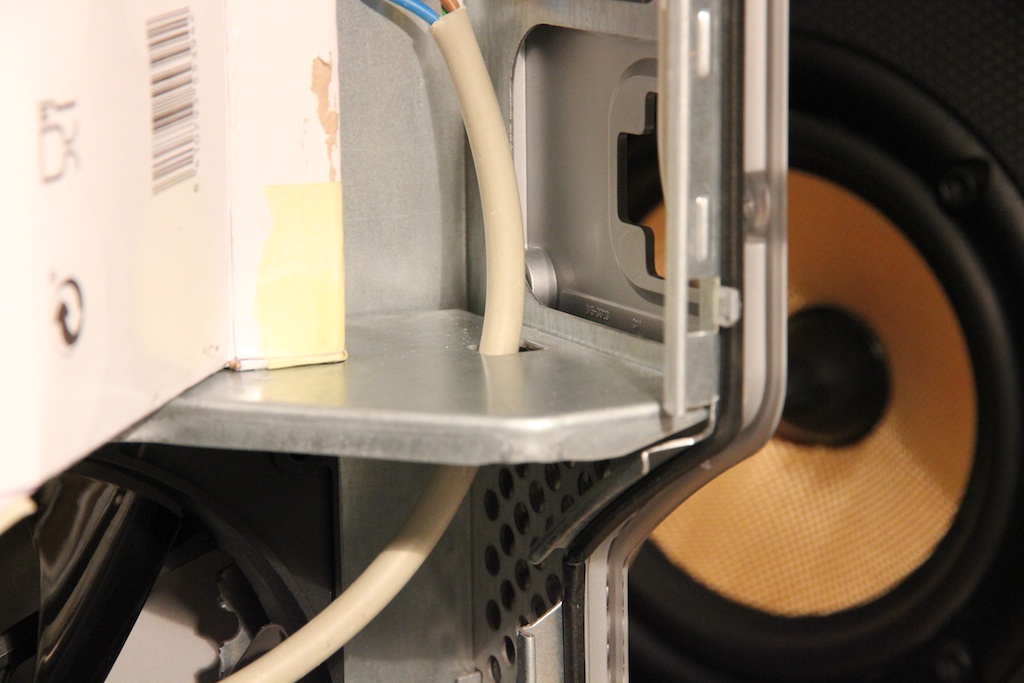
Also, when trying to thread the power cable out of the case, I found that Apple had rather thoughtfully left me a hole in just the right spot:
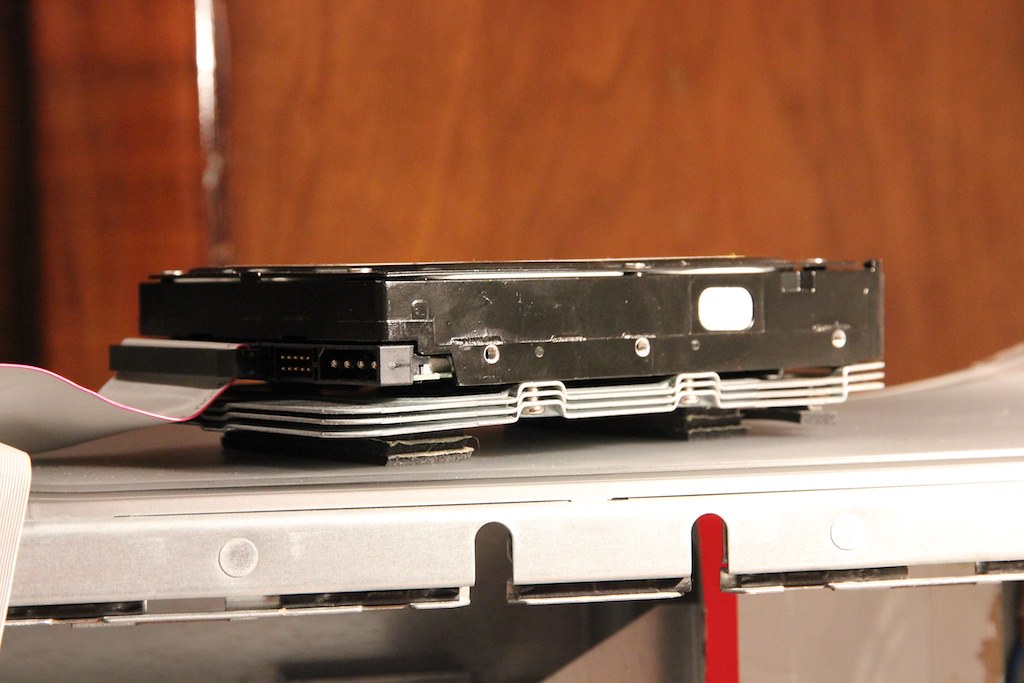
Because the hard drive tended to run a little hot, I tried adding a heatsink of sorts in the shape of three of the drive carriers that these Macs came with:
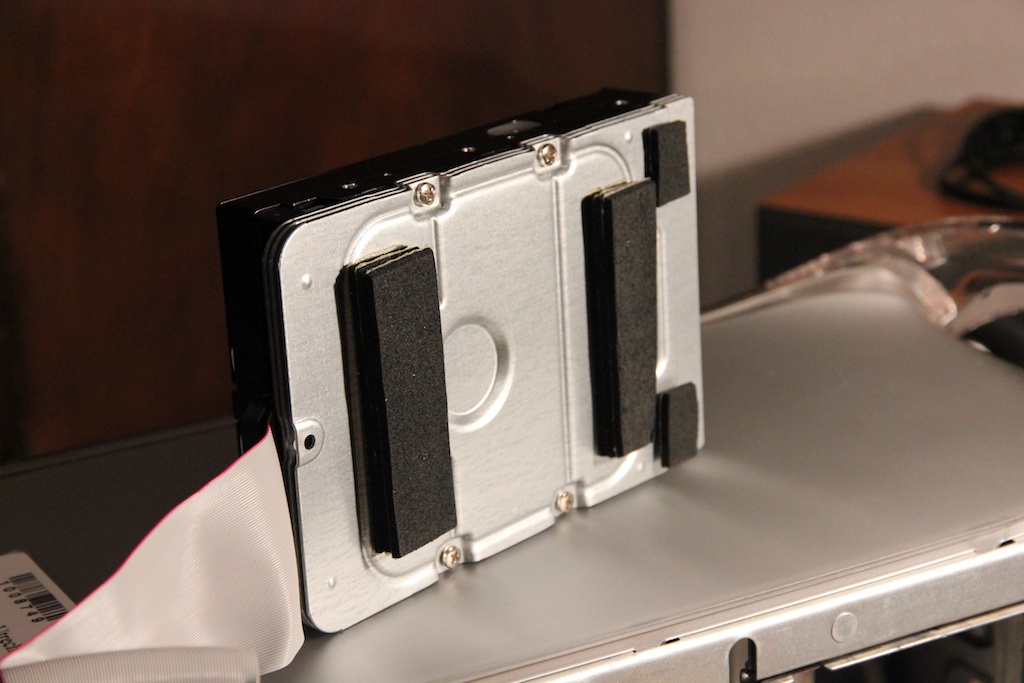
But mostly I think it was placing the drive in the bit of airflow from the CPU fan that made the difference. I added foam rubber feet from some adhesive rubber I had lying around to get rid of the annoying hum:
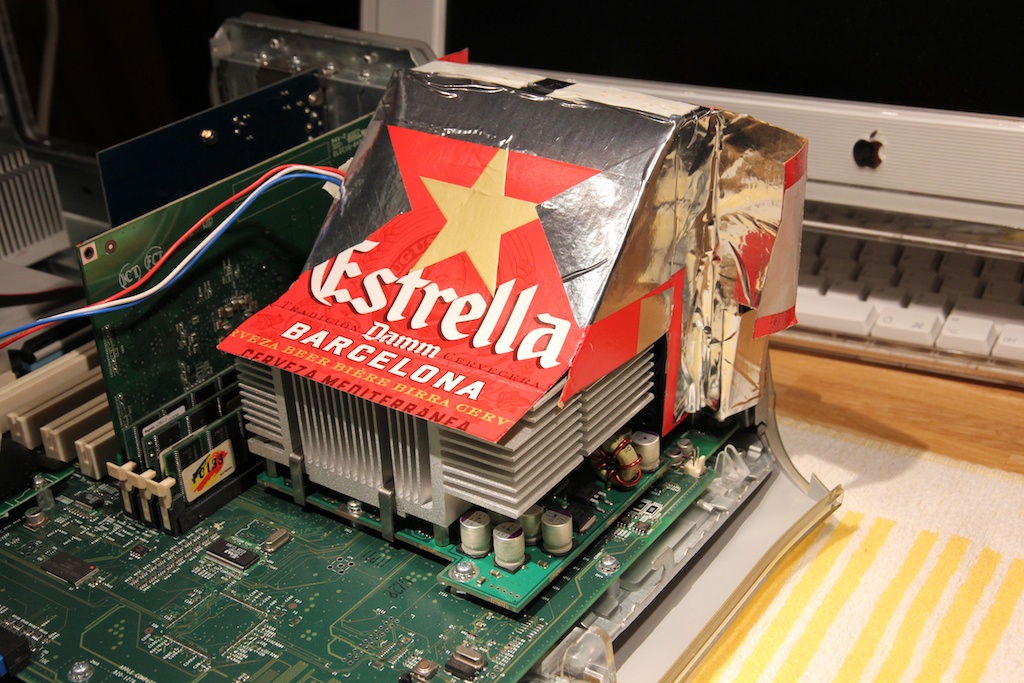
Lastly, and mostly because I can never stop fiddling, I added a heatsink from a dual 1 GHz Quicksilver to the bottom of the case, stuck to a folded piece of aluminium sheet, which in turn is stuck to the PSU. The PSU definitely feels cooler now, so I'm thinking it works at least a little.
With apologies for the haphazard folds. Apparently it is hard to fold straight.
With regard to fan voltages and speeds: I ended up with running the CPU and PSU fans at 7 V, and the large case fan at 5 V. I have taken care to match or exceed the cfm values of the original fans (for instance, the original CPU fan tops out at 23.5 cfm at full speed, the replacement Papst should do around 32 cfm at 7 V, while being all but inaudible). I have made sure the air only comes from outside, and goes where it is supposed to go. The PSU gets sort of warm, the CPU heatsink never really goes above slightly warm.
Final detail: I closed the holes in the bottom of the case below the large case fan. They were exhaust holes before, but now they would simply let warm air in again:
Hope it's clear what I mean, it's the aluminium tape in the background.
So, the work-in-progress result looks like this:
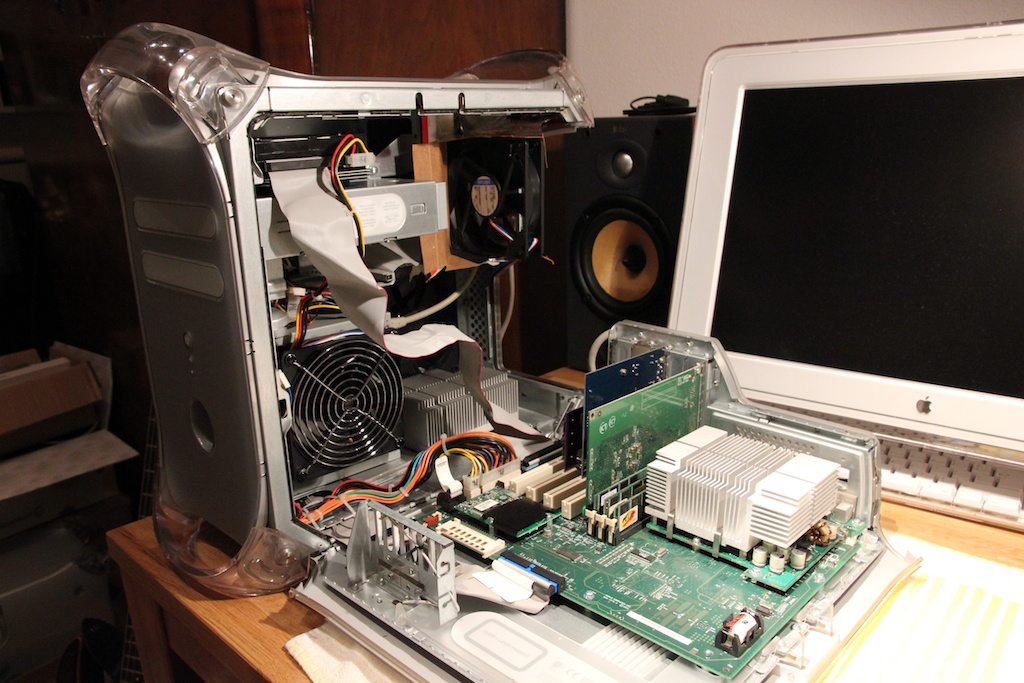
You'll have to excuse the wobbly IDE cable. Eagle-eyed readers will have already noticed the Sonnet SATA card sitting below the sound card. A newer SATA drive should be faster, and produce less heat as well. Also I have got some temperature sensors and fan speed controls coming in to experiment with speeds a little further. Then, when everything is more or less in place, I will replace all the cardboard and double-sided tape with aluminium and, erm, probably double-sided tape. The cables definitely need to be tidied too.
That's all of it for now, but so far it has worked very well. This is taken in the spot where my ears would be when using it:
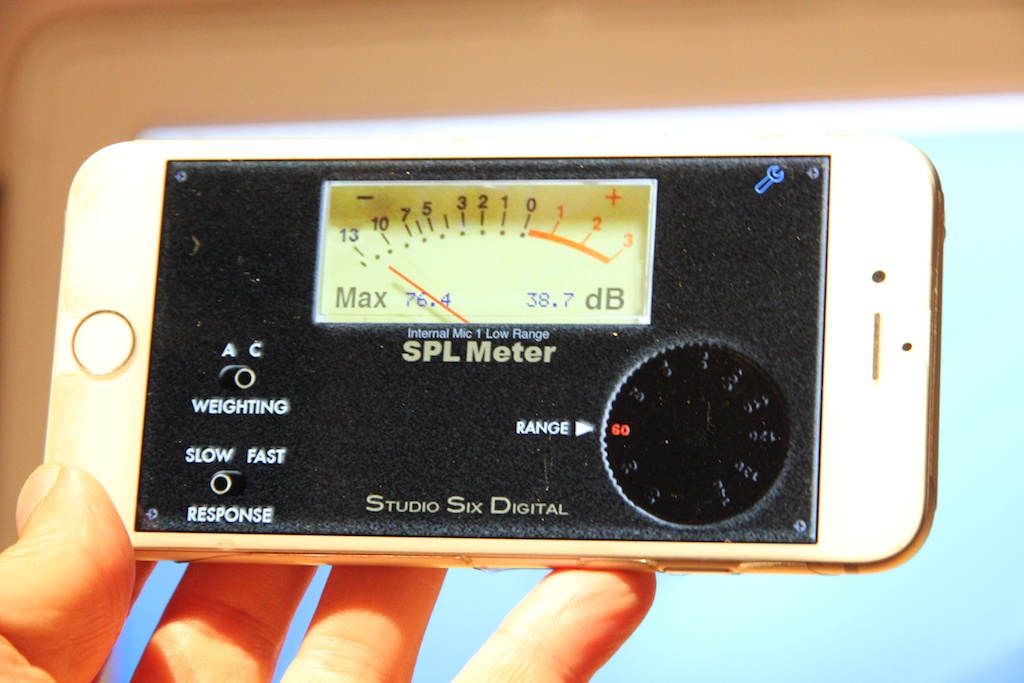
The 2011 iMac next to it will be louder when its fans spin up. Also this is with the Quicksilver on the desk, if I put it under the desk where it usually lives, you can't tell that it's on.
Anyway, I have not found this mod anywhere else, so hopefullly someone will find it useful. I mean, people still use G4 Power Macs right?

 Author
Topic: Quicksilver G4 silencing effort (Read 9095 times)
Author
Topic: Quicksilver G4 silencing effort (Read 9095 times)